

Sewing Tips & Tool Advice
Why Two Rulers Can Give Different Sewing Measurements
Eight Needles Journal · Measuring
Before blaming the pattern, check how you are reading the tools. Different starting points, line thicknesses and viewing angles can create an apparent disagreement between two rulers that otherwise work perfectly well.

Check these differences first
| Possible cause | What you may notice | What to check |
|---|---|---|
| Different zero positions | A similar offset at several readings | Printed zero versus the physical tip |
| Different units or scales | A large, repeated proportional difference | Centimetres, inches, half scale or quarter scale |
| Viewing angle | The apparent reading changes as you move your head | Read directly above the mark |
| Tension or poor support | The tape or paper shifts during measuring | Relax the tape and support the whole piece |
| A damaged tool | A persistent mismatch after careful alignment | Kinks, worn marks, chips or a loose end fitting |
These clues guide the check; they do not prove the cause by themselves. Compare the tools against a reliable reference before deciding that either the pattern or a ruler is wrong.
Compare like with like
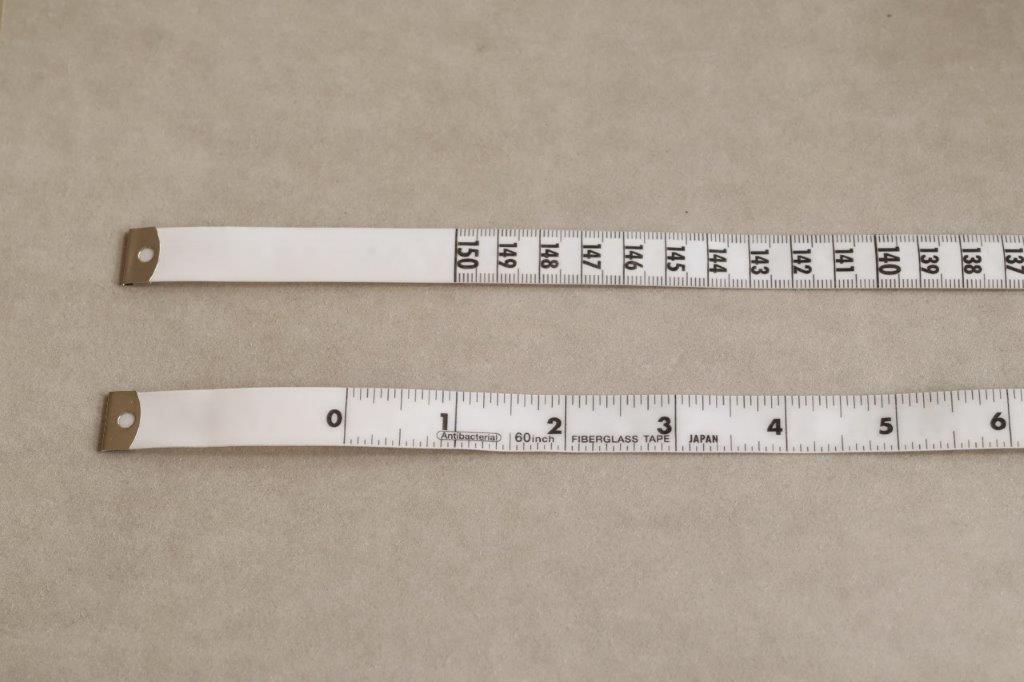
Place both scales on a flat surface and align their printed zeros. Compare several marked intervals, not just the ends. Read directly above the scale rather than from an angle, and decide whether your pencil line is centred on the required measurement.
Do not compare the labels as equal lengths
One inch is 25.4mm. Half an inch is therefore 12.7mm, not 12mm. Similarly, 60 inches is 152.4cm, not exactly 150cm. A tape advertised with metric and imperial ranges does not make those rounded headline numbers interchangeable.
A half-scale ruler presents a full-size dimension over half the physical distance; a quarter-scale tool reduces it further. Check the scale label even when all the numbers look like ordinary centimetres.
Remove avoidable variation
Use one reference tool for a set of related measurements. Keep flexible tapes relaxed rather than pulled tight. Check that transparent rulers lie flat and that worn corners or damaged markings are not being used as the starting point.
Compare an interval away from the end
If a starting edge is worn, compare two clearly printed internal marks. From 5cm to 15cm is a 10cm interval. This helps separate an end-position problem from a disagreement within the scale, although it does not establish the accuracy of every other section.
Also check that you are measuring the same pattern feature. A curved cutting edge and the stitching line beside it can have different lengths even when both measuring tools are correct. Fix the reference line before comparing the numbers.
Record rather than average
If a tool consistently disagrees with a reliable reference, set it aside for investigation. Averaging two readings does not establish which is correct. A clear note about the tool and the discrepancy is more useful than quietly changing your pattern to compensate.
A practical example
Two tools disagree at the end of a long measurement. First check zero, units and viewing angle. Next compare a shorter known interval. If the discrepancy persists, keep a note and set the uncertain tool aside; do not quietly average the readings and build that uncertainty into the pattern.
Check before choosing
- Are the zeros aligned?
- Are the units identical?
- Can I repeat the same reading?
Related tools to compare
Compare the size, material and included parts on each product page against the task above.
 Okane Seisakusho Bamboo Sewing Ruler in 3 sizes (20cm. 30cm. 40cm)
 Bunka 50cm Pattern Ruler with Line
 Hara Doki Glass Fibre Tape Measure 150 cm / 60 inch (With extra gap)