

Sewing Tips & Tool Advice
L-Shaped Rulers: Checking a Right Angle in Patternmaking
Eight Needles Journal · Measuring
An L-shaped ruler gives you a convenient right-angle reference. It can help establish a baseline and check rectangular details, but it should be aligned to a deliberate reference line rather than the nearest edge of the paper.

Compare reach and useful features
| Tool | Useful features | Choose it for |
|---|---|---|
| Bunka multi-purpose L ruler | 15 × 50cm format with a grid, protractor and button-drawing holes | Several drafting tasks in one tool |
| Kawaguchi 60cm L-shaped pattern ruler | A longer transparent form for straight and gentle curved lines | More reach across a larger draft when your table supports it |
| Separate half-circle protractor | A dedicated angular scale | Measuring a specified angle other than simply establishing a right angle |
Check how much of each arm lies comfortably on your work surface. A long ruler is awkward if turning it shifts the paper or catches nearby equipment. For a small pocket pattern, an existing transparent grid ruler may already give you the perpendicular reference you need.
Choose the baseline
Find the centre line, grainline or other reference specified by the drafting method. Place one arm of the ruler along it and use the other arm to establish the perpendicular. A cut paper edge may be convenient, but it is not always square.
Place both references deliberately
Align one straight reference along a useful length of the baseline, rather than touching it at a single point. Then position the perpendicular reference through the exact point where the new line should begin. Hold the ruler so pressure cannot twist it as you draw.
Some multipurpose rulers have curved sections as well as straight ones. The outline’s resemblance to an L is not enough: use the actual straight edge or printed grid line intended for the task.
Check before extending
Make a short light line first. Confirm the ruler has not shifted, then extend with a straight ruler if needed. Repeated small errors at the start of a draft can make later measurements difficult to reconcile.
Prepare and protect the drawing surface
The Bunka L ruler is supplied with a removable protective film. Remove the shipping film as directed before use so it does not obscure the markings. This instruction is specific to that product; do not peel apart the permanent laminated layers of other rulers.
Keep drawing rulers away from cutting blades and hot ironing boards. A chipped edge changes the line you draw, while heat can distort the shape. Put the ruler away supported so a projecting arm is not bent under other tools.
Use a second check
For a rectangle, check the opposite sides and compare its diagonals before cutting. This can reveal a shape that looks square at one corner but has drifted elsewhere. Keep all measurements in the same unit throughout the check.
Do not force every pattern corner to 90 degrees. A drafted right angle is correct only where the pattern or construction method calls for one. Shoulder slopes, darts and shaped corners need their intended geometry, even when a square corner looks tidier.
A practical example
You are drafting a rectangular pocket. Establish the first right angle from a deliberate baseline, then check the opposite edges and diagonals. If only one corner has been checked, the far edge can still drift. Correct the paper while the lines remain light and easy to revise.
Check before choosing
- What is my true baseline?
- Does the ruler fit the paper?
- Have I checked more than one corner?
Related tools to compare
Compare the size, material and included parts on each product page against the task above.
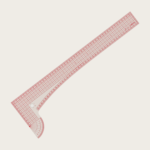 Bunka – Multi-purpose L Shaped Ruler
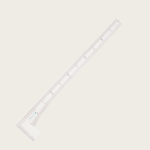 Kawaguchi L-shaped Pattern Ruler 60cm
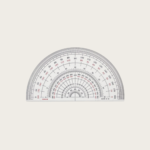 Concise 15cm Half Circle Protractor