

Sewing Tips & Tool Advice
How to Measure a Curved Seam on a Paper Pattern
Eight Needles Journal · Measuring
A curved seam should be measured along the line that will actually be sewn. Measuring the nearby cutting edge answers a different question. Before choosing a tool, identify the stitching line and the start and end points in the pattern instructions.

Choose how to follow the line
| Method | Good starting point | Watch for |
|---|---|---|
| Flexible tape on edge | Occasional curves using a tape you already own | Twisting, tension and a blank section before zero |
| Clover Paperfeel ruler | Gentle curves and a clearly visible metric scale | Forcing a tight bend or letting the measuring edge lift away |
| Kawaguchi measuring wheel | Following a curved paper line by rolling | Slipping, crossing away from the line or reading the wrong scale |
A French curve helps draw a smooth outline; that does not mean its entire edge is a calibrated measure of the line you have drawn. Select a measuring method separately.
Measure with a tape, step by step
- Flatten the paper and identify the stitching line. Mark the exact seam intersections where sewing begins and ends.
- Stand the tape on its narrow edge, with its correct zero at the starting mark. Let it follow the curve without stretching or folding it.
- Hold short sections in place as you advance. At a tight change of direction, measure to a clear intermediate mark and record that section before continuing.
- Read the endpoint directly above the line. Record the unit and the section, such as “front armhole, shoulder to notch”.
Do not substitute a series of long straight measurements across the curve: those shortcuts cut across the inside of the bend and underestimate its length.
Work in manageable sections
Use a flexible ruler or move a tape carefully along the curve without pulling the paper. A measuring wheel offers a different way to follow the line. Whatever the method, keep the tool on the same reference line from beginning to end.
Account for what the pattern intends
Compare matching seams between their specified marks. Differences may be intentional, such as ease between notches. Do not redraw one piece simply because two totals differ; first check the pattern's construction notes and whether seam allowances were included in the comparison.
A useful comparison record
For example, if two matching sections measure 18.2cm and 18.8cm, their difference is 0.6cm. That arithmetic does not tell you whether the difference is an error, ease or gathering. Note which section is longer and check the instructions before changing either piece.
Close a dart or fold only when the construction method requires it for the edge being measured. Use the same construction stage for both pieces. A raw outline and an edge after a dart is closed are different comparisons.
Check your method
Measure the same curve again from the other end. If the results differ noticeably, repeat more slowly and divide the curve into shorter sections. This is a measurement check, not a reason to force the pattern into a new shape.
A practical example
A sleeve-cap seam appears longer than the armhole. Before altering either piece, compare the prescribed sections between matching notches and read the ease instructions. Measuring the entire outer cutting edge can hide both the intended distribution of ease and the location of the true stitching line.
Check before choosing
- Am I following the seamline?
- Have I identified the matching notches?
- Does the pattern specify ease?
Related tools to compare
Compare the size, material and included parts on each product page against the task above.
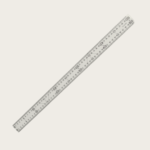 Clover 50 cm Paperfeel Flexible Ruler
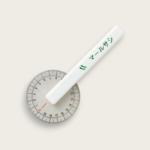 Kawaguchi Measuring Wheel – Transparent (Also Suitable for Left-Handed Use)
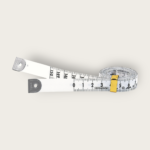 Hara Doki Glass Fibre Tape Measure 150 cm / 60 inch (With extra gap)