

Sewing Tips & Tool Advice
French Curves, Armhole Rulers and D Curves Explained
Eight Needles Journal · Patternmaking
A shaped ruler offers a family of curves, not a complete pattern solution. An armhole ruler or D curve helps connect points smoothly, but the points themselves must come from your measurements and drafting method.

Compare the curve, not just the name
| Tool | Typical task | What to compare |
|---|---|---|
| Bunka D curve | Deeper neckline, armhole and crotch curves | The short section that follows your plotted points |
| Bunka H curve | Gentler skirt and trouser side seams | Whether the long, shallow bend suits your line |
| Armhole ruler | Connecting points around armholes and sleeve curves | Its actual outline and the drafting method you use |
| French curve | A selection of curved edges for drawing | Shape, size and any useful graduations; sets differ |
For Bunka, D refers to “Deep” and H to “Hip”. The names suggest a purpose, but they do not specify the finished garment size. An armhole ruler does not replace body measurements, a block or the instructions for drafting that armhole.
Fit a section of the edge
Rotate and slide the ruler until part of its curve passes naturally through your reference points. You do not need to use the whole edge. Trace lightly and continue with overlapping sections so the joins can be checked.
Try a short section before buying more curves
Choose one awkward area from a pattern you use often. See whether your existing curve can follow its beginning, middle and end by repositioning. If it can, a second similar ruler may add little. If you repeatedly struggle with a long, shallow hip line, an H curve offers a different shape rather than another version of the same deep curve.
A curve set can be useful if you want both shallow and deep outlines together. For example, Clover 25-051 combines those two shapes with a 15cm mini ruler and a case. That is a different format from a single D curve; compare the useful edges rather than counting the pieces.
Look at the direction of the line
A smooth-looking curve can still meet the next line at an awkward angle. Check the transitions at shoulder, side seam or other joining points specified by the pattern. Compare adjoining pieces before accepting the final shape.
Drawing a curve is not checking its length
After redrawing an armhole or neckline, measure the new seamline and check its matching piece. A smooth outline can still be too long or too short. Use a flexible tape, suitable graduated ruler or measuring wheel to check the required sections; do not assume every unmarked template edge measures length.
Keep the pencil point close to the edge and use light pressure. Thick, repeatedly drawn lines make it harder to decide which line to sew. These drawing rulers are not cutting guides: a blade can nick the edge you need for smooth drafting.
Preserve the original
Work on a traced copy when experimenting. Label the new curve and keep the original line visible until you have checked the change. That record lets you reverse an adjustment instead of trying to remember which version you started with.
A practical example
Three plotted points define a curved edge. Find the section of the ruler that joins them naturally, rather than forcing all three against its longest curve. Trace lightly and inspect the transition into the neighbouring straight line before accepting the final shape.
Check before choosing
- Which part of the curve fits?
- Are the joins smooth?
- Have I kept the original reference?
Related tools to compare
Compare the size, material and included parts on each product page against the task above.
 Armhole Ruler
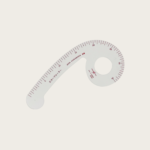 Bunka D curved ruler
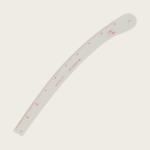 Bunka – H Curved Ruler