

Sewing Tips & Tool Advice
Choosing a First Sashiko Sampler
Eight Needles Journal · Sashiko
For a first sashiko project, choose the amount of preparation you want as carefully as the pattern. Printed cotton cloth lets you concentrate on following the stitches. A kit that requires tracing adds a separate skill before the sewing begins—even when it includes more materials.
Printed sampler or tracing kit?
| Option | Starting point | What to check |
|---|---|---|
| Daruma white traditional sampler | 34 × 34cm cotton cloth with printed stitching guides | Choose one of eight designs; add thread and a suitable needle |
| Daruma white pop-pattern sampler | A different selection of printed motifs | Choose the actual design, not just the series name |
| Daruma linen handkerchief kit | Approximately 38 × 38cm; pattern must be transferred | Includes thread, needle, threader, tracing paper and three patterns; Japanese instructions |
The white traditional sampler includes instructions in English and Japanese. The linen kit has Japanese-only instructions, and its cloth, thread colour and pattern selection vary with the option chosen. A tracing tool and scissors are not listed among its included contents.
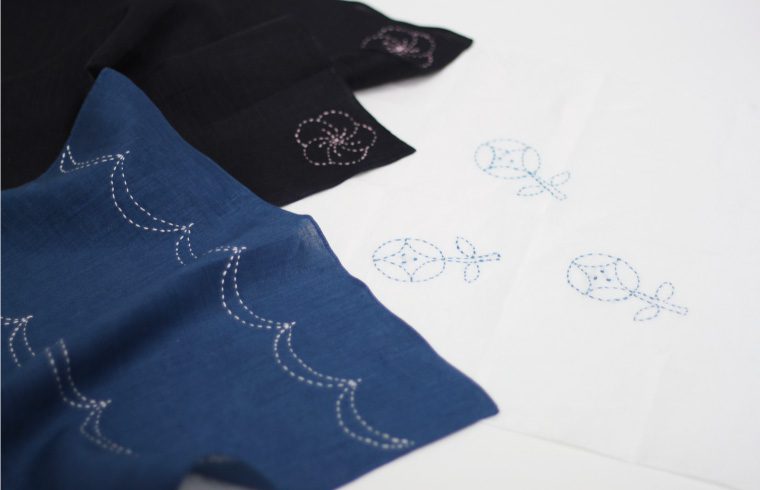
Look closely at one repeat
A small project is not necessarily the simplest one. A compact design can contain many tight turns, short stitches or repeated changes of direction. Look at a close-up and trace one section with your finger before choosing. Can you see where the line goes next?
A pattern with clearly separated lines gives you room to practise regular stitches and relaxed tension. If an intricate design is the one you love, it can still be a rewarding first project; allow time to read its stitching order and work in small sections.
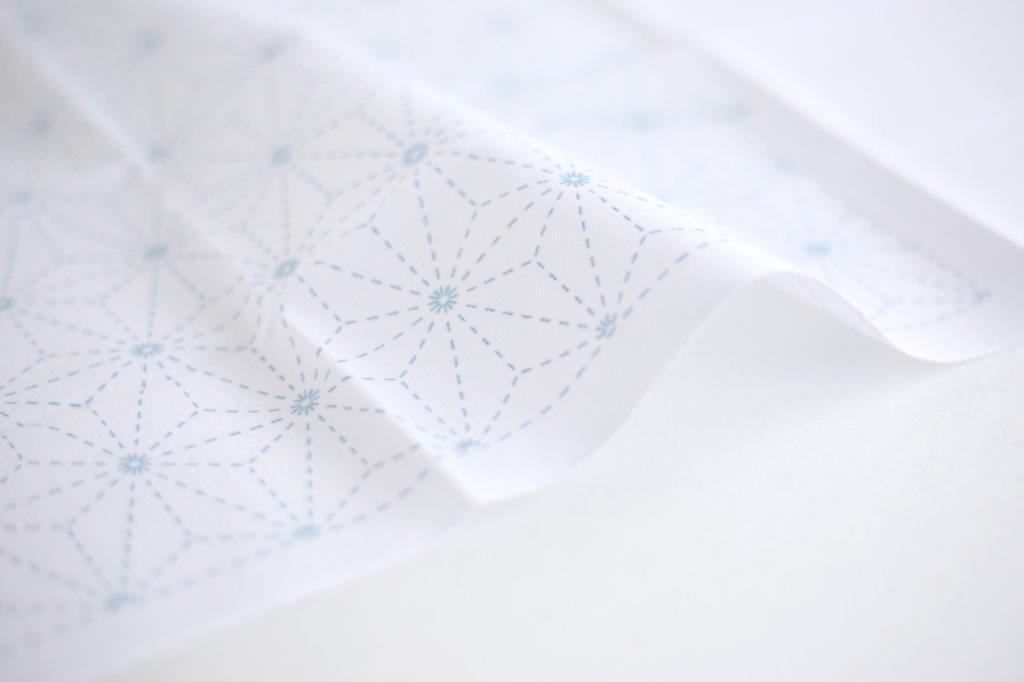
Check the instructions before the first stitch
Look for the preparation of the cloth edges, the order of stitching, the treatment of intersections and the finishing method. A finished photograph shows the destination, but it cannot explain every turn on the reverse.
Read the supplied instructions through once before starting. Keep them with the cloth. For a grid-based design, confirm which lines are guides and which are stitched; for a traced motif, check placement and the direction of the transfer paper before pressing over the full design.
Choose a visible thread
A single colour that contrasts clearly with the cloth makes it easier to inspect your stitches. Variegated thread can be lovely, but its pale sections may become difficult to distinguish against white fabric. Try a short section before committing to the full pattern.
Use a needle that accepts the thread comfortably and passes through the required layers. If it is difficult to pull through, reduce the number of stitches loaded on the needle and reassess the combination. Forcing the needle is not a useful way to learn the rhythm.
Keep the guides until you have finished using them
For a sampler with water-removable printing, complete the stitching that depends on those lines before washing. Follow the packet’s removal and pressing directions. Do not apply the preparation routine for plain, unmarked cloth automatically to a printed sampler.
Before removing the guides, look over the whole pattern for an unfinished line. Then finish, wash and dry as directed. Assess your tension when the cloth is laid flat; a project that lies comfortably is a better learning record than one with perfectly counted stitches pulled too tightly.
Choose the project you want to finish
See the white traditional samplers, white pop-pattern samplers and linen handkerchief kits. Choose one project and its compatible materials, rather than several patterns with missing essentials.
