

Sewing Tips & Tool Advice
Straight Rotary Cuts: Ruler, Mat and Alignment
Eight Needles Journal · Rotary cutting
A straight rotary cut depends on three things working together: a ruler that stays aligned, a suitable mat under the whole cut and a blade that rolls cleanly through the fabric. Buying a longer ruler solves only one of those problems.
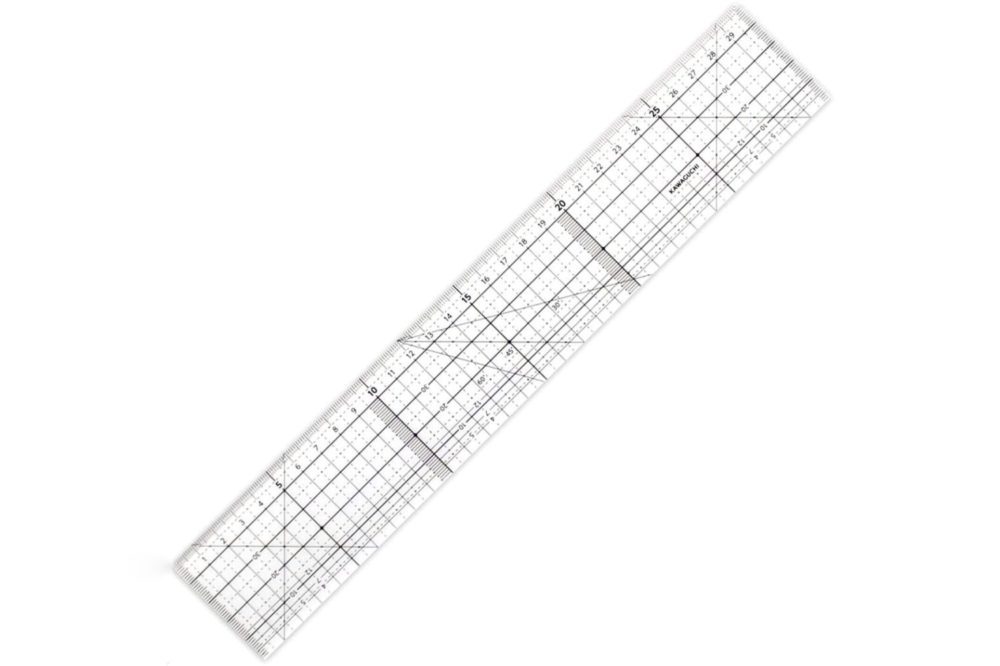
Compare the guide as well as its length
| Guide | Where it may help | Important distinction |
|---|---|---|
| Kawaguchi 30cm Cutting Ruler | Short strips, small pieces and a compact workspace. | Metric markings; use the thicker edge for cutting. |
| Kawaguchi 60cm Cutting Ruler | Longer straight sections with fewer ruler placements. | The extra length still needs support and a comfortable reach. |
| Clover Strip Ruler, Colour Line 30cm, 57-928 | Patchwork pieces and repeated alignment using angle lines. | An 8cm-wide body; its coloured border is 7.5mm wide. |
| Clover Tape Cutting Ruler, 57-924 | Repeated strip cutting with a slotted guide. | A different guiding system; check the cutter specified for the slots. |
A slim drafting ruler is not interchangeable with a cutting ruler. Equally, a metal edge is not a universal requirement: the Kawaguchi cutting rulers use acrylic cutting edges. Choose a ruler designed for the tool and use the side intended for cutting.
Prepare a reference edge you can trust
Lay the fabric flat without stretching it. Check the grain and the pattern instructions before choosing a reference edge; a shop-cut end or a printed stripe is not automatically square to the fabric grain.
For repeated strips, establish a clean starting edge, then align the required width along that edge using the ruler’s markings. Check the measurement at both ends. The cutting edge is where the blade travels; a coloured border or nearby printed line may represent a different distance.
For example, a 7.5mm border is not a 7mm allowance. Read the scale on the ruler in your hand rather than transferring a familiar setting from another model. Use one consistent measuring reference throughout a batch.
Set the whole cut on the mat
Place the mat on a stable, flat surface. Support the fabric beyond the cutting area so its weight does not pull the layers out of position. A mat grid helps you organise the layout, but it does not hold the fabric still.
A 60cm ruler does not make a smaller mat long enough. Before exposing the blade, check where the cut starts and ends and whether you can reach the whole section comfortably. If you cannot, plan a pause instead of stretching forward.
Hold the ruler without crowding the blade
Apply steady pressure to keep the ruler in place, with fingers behind the cutting edge and outside the cutter’s path. A non-slip surface helps but does not make movement impossible. Keep weights and other tools clear of the route.
Guide the cutter alongside the intended edge without forcing it sideways against the ruler. If it starts climbing the edge or the ruler shifts, stop. Cover the blade before adjusting your hand or resetting the layout.
Check the first strip before cutting the batch
Measure the strip at the start, middle and end. A changing width suggests that the alignment or hold needs attention. A straight edge with occasional connected threads points to a different problem: inspect the blade, layer count and mat before continuing.
Leave the remaining material aligned while you check the result. Pulling an incompletely cut strip away can move the fabric and make the next cut harder to judge. Resolve the cause on a spare piece rather than repeatedly rolling along an uncertain line.
Choose the length for your usual work
The shorter Kawaguchi ruler is easier to place around small pieces; the longer one gives a longer continuous reference. Either can be useful alongside a broader patchwork ruler. Start with the cuts you repeat most often, then add another format when it solves a specific problem.
Tools to compare
 Kawaguchi 30cm Cutting Ruler
 Kawaguchi 60cm Cutting Ruler
 Olfa Rotary Cutter 45mm with Special Endurance Blade (RTY-2/G + RB45H-1)