

Sewing Tips & Tool Advice
Seamline or Cutting Line? A Patternmaking Distinction
Eight Needles Journal · Patternmaking
The seamline shows where stitching joins the pieces. The cutting line includes whatever seam allowance the pattern specifies. Knowing which line you are following is essential when measuring, adjusting or transferring a pattern.

Which line should you follow?
| Line | Meaning | Use it for |
|---|---|---|
| Seamline | The intended stitching position | Checking matching seam lengths and altering fit |
| Cutting line | The boundary of the fabric piece before sewing | Cutting after all required allowances are included |
| Fold line | Where the material folds | Positioning an on-fold edge, hem, pleat or facing as instructed |
A line’s meaning comes from the pattern key and instructions. A solid line is not automatically a cutting line, and a dashed line is not automatically a seamline. Multisize patterns may use different line styles simply to identify sizes.
Read the pattern's convention
Some patterns include seam allowances; others require you to add them. Check the instructions before altering the outline. Do not assume the convention from the appearance of a single piece or from a pattern you used previously.
A simple allowance example
Imagine a rectangular panel with 10cm between its two vertical seamlines. With a 1cm allowance outside each of those seams, its cut width is 12cm: 1 + 10 + 1. This example concerns two sewn sides; an edge placed on a fabric fold needs the treatment specified by the pattern, not an automatic extra 1cm.
Adding an allowance twice makes a piece larger; cutting on the seamline of a pattern that still needs allowance removes the fabric needed for the join. Check this before cutting, while the error is still easy to correct on paper.
Measure the intended relationship
When comparing two seams, use their stitching lines and matching points. When planning a cut, use the cutting line. Around a curve, the two lengths can differ, so measuring the outer edge may not tell you whether the stitched seams match.
Choose a tool for the stage
A transparent grid ruler is useful for drawing a consistent offset on paper. A sliding gauge helps check the same short allowance repeatedly. Chalk or a fabric marker transfers selected information onto cloth after you have tested visibility and removal. A thick chalk core does not define an accurate seam by itself; maintain a clear working edge and decide which side of the mark you follow.
The Bunka line ruler has a 15mm coloured band and a 12mm guide. Neither should silently replace the allowance in your instructions. In particular, 12mm is not exactly half an inch, which is 12.7mm.
Label alterations clearly
Keep the working seamline visible while checking a change, then establish the cutting line using the allowance required for that edge. Different edges may have different allowances. Record those differences rather than relying on memory at the cutting table.
At corners, darts and turned hems, also check how the edge will sit after folding or sewing. A constant distance drawn around the flat outline may still need its ends shaped to match the construction. Preserve the pattern’s existing corner treatment unless the alteration requires you to recheck it.
A practical example
A pattern uses one allowance at the side seam and a different allowance at the hem. Mark the working seam or fold lines first, then add the allowances individually as instructed. Extending the same distance around every edge would lose the intended difference.
Check before choosing
- Are allowances included?
- Which line answers my measurement question?
- Do all edges use the same allowance?
Related tools to compare
Compare the size, material and included parts on each product page against the task above.
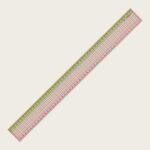 Bunka 50cm Pattern Ruler with Line
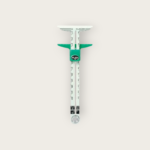 Clover Sliding Gauge
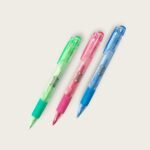 Sodeyama 4.0mm Click Chalk Pencil in 3 Colours