

Sewing Tips & Tool Advice
Marking Dark Fabric: Contrast and Removal
Eight Needles Journal · Marking
On dark fabric, a clear pale line is a pleasure to follow. The right tool also lets you remove that line without leaving a pale trace behind.
Black cotton, navy wool and dark felt can all need different approaches. Colour is the first part of the choice; the fabric’s surface, the precision you need and the removal method decide the rest.
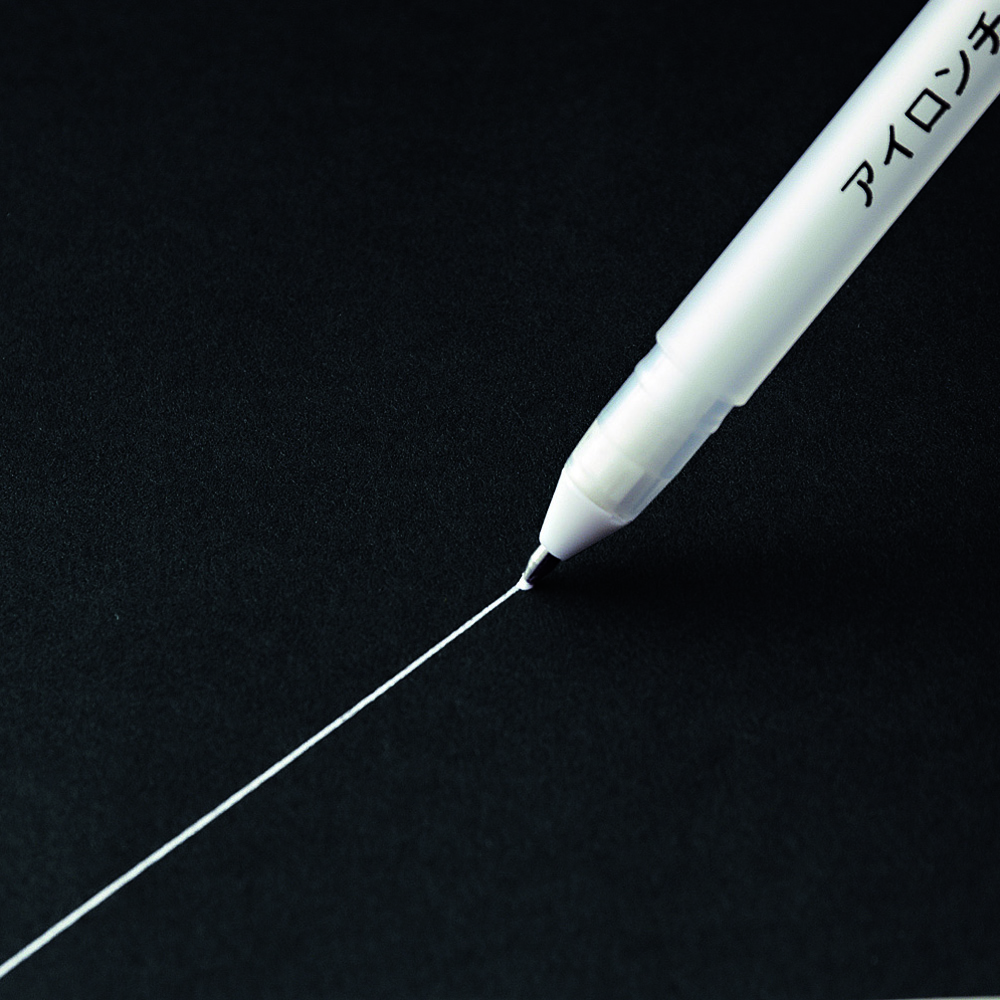
Five options to compare
| Method | Where to start | What to check |
|---|---|---|
| Clover white marker | Fine lines on dark cloth. | Allow the ink to develop; test the specified ironing or washing removal. |
| Sewline white or contrasting lead | Small matching points and precise construction lines. | Check that the lead marks without dragging the surface and removes cleanly. |
| White triangular chalk | Longer cutting or construction lines. | Maintain a fine edge and test removal of this particular chalk. |
| Contrasting powder chalk | Lines made with a chalk wheel. | Check both visibility and resistance to the handling the work will receive. |
| Thread marking | Projects where coloured marks or liquid removal are unsuitable. | Test the needle, thread, visibility and removal without damage. |
For a fine line, compare white ink with a fabric pencil
The Clover Iron and Water Erasable White Marker produces a white line that appears gradually. If the first stroke looks faint, pause before adding more. A line that has not yet developed can be mistaken for an empty pen.
Its removal options are ironing or water washing. Choose only a treatment the cloth can tolerate, and follow the pen’s instructions. A compatible refill is available, so check the model before replacing the whole pen.
A Sewline fabric pencil offers a different feel: a dry mark from a 0.9mm lead, without a developing-ink delay. The white/black/tracer Trio is useful to compare if you regularly switch between dark and light fabric. The third point is an ink-free tracer, not another colour.
White is a sensible starting point on black or navy, but try other available contrasting leads on busy prints. The most useful colour is the one you can follow across both the light and dark parts of the pattern.
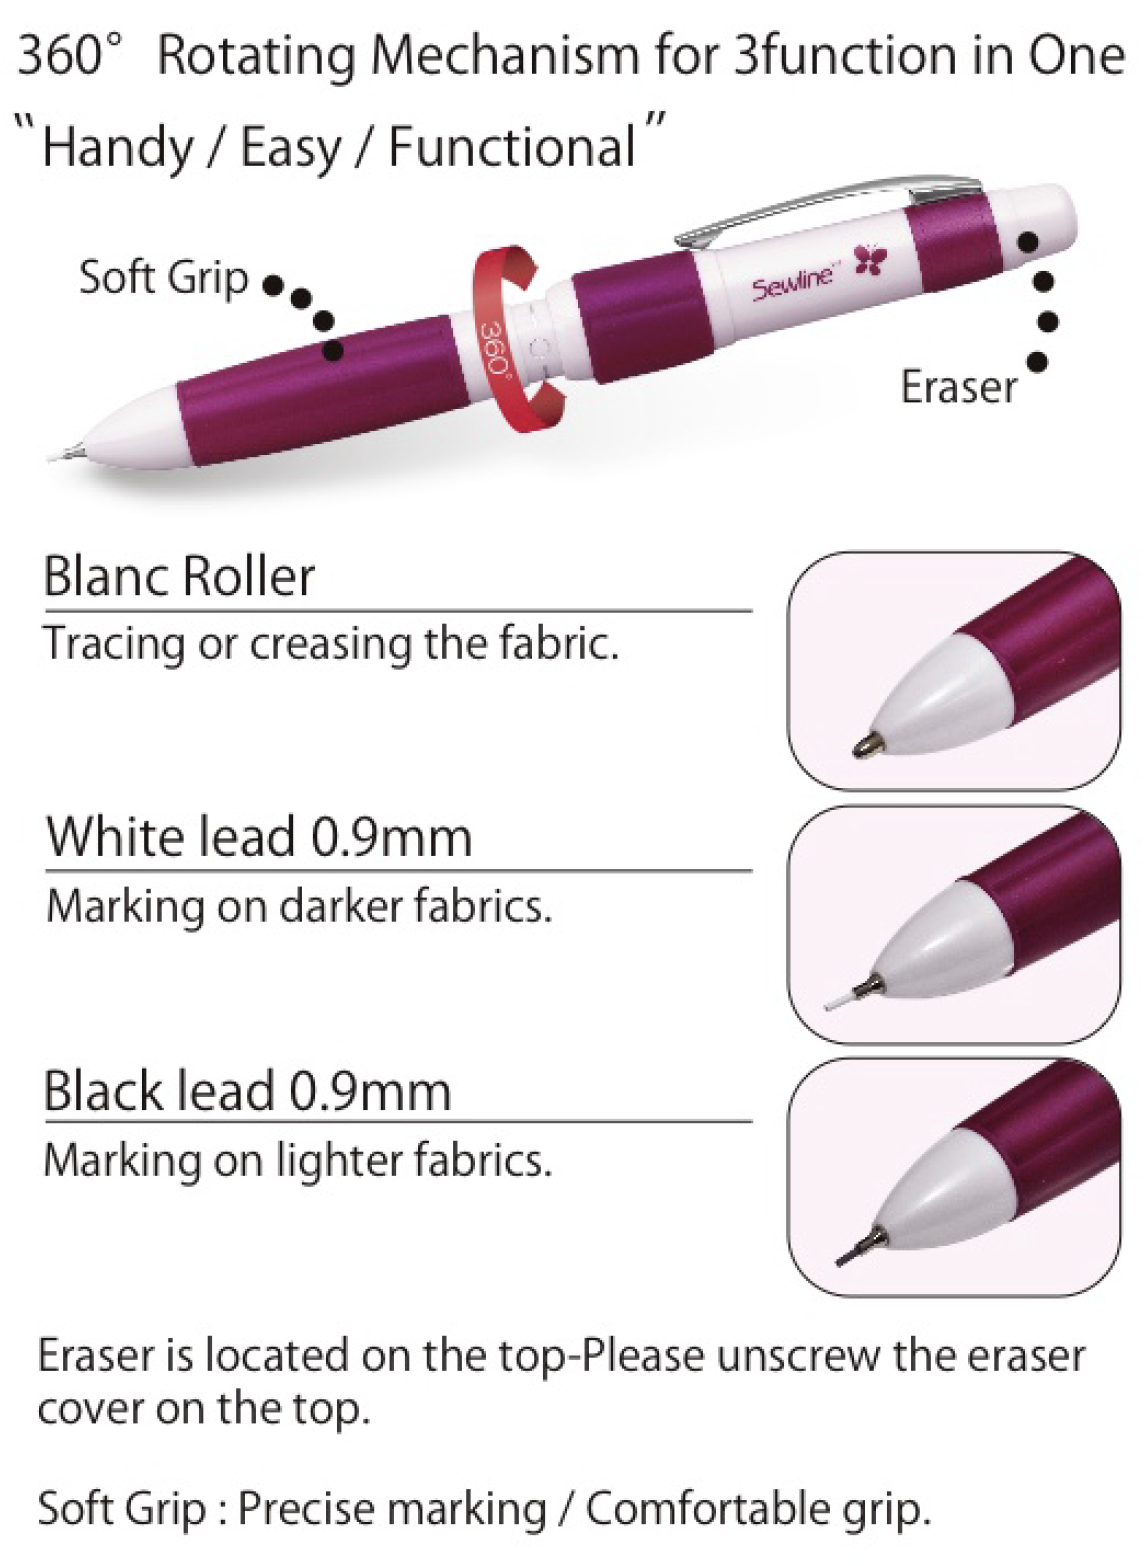
Make sure the point you selected is a marking lead
If a Trio leaves no coloured line, check which function is extended before pressing harder. The rounded tracer works by pressure and does not deposit white pigment. With the white lead selected, make a light sample stroke; with the Clover white ink pen, allow the mark to develop. These are two different reasons a first line may be hard to see.
For longer lines, try chalk with a prepared edge
A large piece of chalk need not leave a broad line. Its working edge determines how precisely it marks. Try a light stroke along a ruler, then check whether you can identify the intended cut or stitch position without ambiguity.
A powder wheel avoids sharpening, but its handling is different from a pencil. Try a curve as well as a straight line, and move the cloth as you would while cutting and sewing. If the guide brushes away too easily, it may be more useful for immediate cutting than for a project that will be repeatedly folded and handled.
Felt, wool and stretchy cloth need a separate trial
Do not assume that a pen which glides over smooth cotton will behave the same way on a raised or yielding surface. Watch the fabric as you draw. If the point catches fibres, pushes a ridge ahead of it or stretches the cloth, the line may no longer be where you intended.
Try another tool before increasing pressure. Also consider the finishing step: a felt decoration or structured wool garment may not tolerate the water treatment that works for a washable cotton panel.
Check the mark where you will sew
Move the sample from the window to your machine or hand-sewing position. Bend it and change its angle to the light. A mark that photographs clearly may be awkward to follow while the piece is draped over your hands.
After the expected working time, remove it as directed and let the sample dry. Compare it with unmarked cloth, looking for a pale outline, residue or a change in the surface. If you cannot get a satisfactory result, choose a different method before marking the garment.
Follow the complete fabric-marker test · Compare all the marking options
