

Sewing Tips & Tool Advice
A Beginner’s Patternmaking Tool Kit
Eight Needles Journal · Patternmaking
A useful first patternmaking kit supports measuring, drawing and holding paper steady. You can add specialised curves and transfer tools as your projects require them. Begin with the instructions for your course or pattern system rather than a universal shopping list.

Build the kit around five jobs
| Job | Useful first tools | Add later if needed |
|---|---|---|
| Measure | A readable metric ruler and flexible tape | A measuring wheel for repeated curve checks |
| Draw | Pencil, eraser and transparent grid ruler | A D or H curve suited to your drafting method |
| Copy | Translucent pattern paper for tracing an existing pattern | A suitable tracing wheel and transfer medium for another copying method |
| Hold and cut paper | Stable weights and paper scissors | A paper-cutting setup with an appropriate mat and cutting ruler |
| Keep information | Project notes and a labelled envelope or folder | A carrying case if you travel to lessons |
Check what you already own before shopping. A fabric marker is not a replacement for a lasting pencil line on a stored paper pattern. Keep paper scissors separate from the shears you reserve for cloth.
Start with the drawing tasks
Choose a clearly readable straight ruler and the curve type your method uses. Add a pencil that produces a controllable line on your paper. A tool that is comfortable on your table is more useful than a larger one that never lies flat.
Compare a short ruler with a longer one
A 20cm ruler is convenient for pockets, short offsets and a crowded table. A 50cm ruler reaches farther across an adult garment pattern with fewer moves. A 60cm ruler helps only when you can support and position its extra length. Longer does not automatically mean more accurate if the end overhangs or knocks other tools.
For example, Bunka’s 50cm ruler with a line has a 5mm grid, a 15mm coloured band and a 12mm guide. Those are aids to reading and alignment. Your pattern still decides the seam allowance.
Add control before complexity
Keep paper aligned with a suitable holding method. Organise pattern pieces and label them as you work. Good reference lines and clear notes often prevent more mistakes than an additional specialised ruler.
Choose the next purchase from the actual difficulty
If paper keeps slipping, improve how it is held. If a neckline is awkward to redraw, compare the shape of a curve ruler. If matching seams seem inconsistent, check your measuring method and starting points before buying another gauge. These are different problems, and each suggests a different tool.
For a class using half-scale exercises, obtain the specified reduced-scale tools and label them separately. A short full-size ruler and a half-scale ruler may look similarly compact, but their numbers represent different lengths.
Build a project-specific kit
Read the next exercise and identify what your current tools cannot do conveniently. Borrow or compare a specialised tool before buying several versions. Keep the kit easy to pack so it moves between storage and the table without losing essential pieces.
A practical example
The next lesson asks you to draw a basic block and transfer its markings. Start with the course's ruler and curve requirements, then identify the paper-holding and copying method. Buy the missing function, rather than a second version of a tool that already performs it.
Check before choosing
- What does my course specify?
- Which task is currently difficult?
- Can I store the tools flat and safely?
Related tools to compare
Compare the size, material and included parts on each product page against the task above.
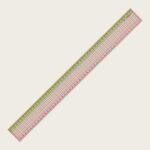 Bunka 50cm Pattern Ruler with Line
 Armhole Ruler
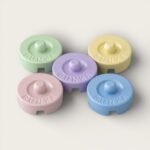 Bunka Pattern/Fabric Weight – Gelato Pastels in 5 options