

Sewing Tips & Tool Advice
Visible Mending: Assemble a Useful Sampling Kit
Eight Needles Journal · Sashiko & thread
Visible mending combines a practical repair with a deliberate stitched appearance. Before choosing a decorative thread, examine the damaged area and the strength of the surrounding fabric. The stitch design alone does not establish that a repair will last.

Build the kit around the repair
| Job | Useful starting materials | Main check |
|---|---|---|
| Patch a worn woven garment | Compatible patch cloth, sewing needle, thread and temporary holding stitches | The patch reaches sound fabric beyond the damage |
| Add visible running stitches | Sashiko thread, a suitable sharp needle and a tested marking method | All layers can be stitched without forcing the needle |
| Weave a darn over a small hole | Suitable repair yarn or thread, a compatible needle and a darning support | The new woven area remains comfortable and flexible |
Decorative running stitches and a woven darn do different work. A thread assortment cannot replace the patch or support your chosen method needs. Inspect the garment first, including the reverse and the fabric around the visible hole.
Make the repair sample realistic
Use a representative patch and the same layer arrangement as the garment. Choose a needle and thread that pass through comfortably. Test the planned stitch spacing and check whether the fabric puckers or becomes excessively stiff.
Match care requirements
The garment, patch and thread need a compatible care method. Test colours and treatments as appropriate before repairing a visible area. Avoid assuming that a thread intended for decorative work suits every garment or washing routine.
Start with a limited set
Keep one suitable needle range, a few thread colours and sample cloth together. Add tools when the repair requires them. Label successful combinations so the next repair can build on what you learned from the sample.
Compare two thread weights on the same layers
Daruma Regular 40m is four-ply cotton; the Thick 30m card is six-ply cotton. Compare their appearance and handling on a representative patch. More visible thread is not proof of a stronger repair, and dense stitching can make a soft area feel firm.
With Misuya sashiko needles, Daruma Thick needs the long or extra-long option. The extra-short, short and medium options do not have a suitable eye for that thread. A threader cannot enlarge the eye; choose the thread and needle together.
Keep the small essentials together
Add sharp thread scissors, a way to hold the patch temporarily and a secure place for needles. If you need layout lines, test both marking and removal on the actual materials. For a garment that cannot be washed, do not choose a water-removable mark simply because it worked on a cotton sampler.
Include a label for the sample: garment fabric, patch fabric, needle, thread, stitch spacing and care method. After the trial has been handled and washed as intended, record whether it still lies flat. That turns a small kit into a useful record for later repairs.
A practical example
A worn area needs a patch as well as decorative stitching. Test the patch and thread through the same layer arrangement, then handle the sample as the garment will be used. A visually appealing stitch should not make the repaired area impractically stiff.
Check before choosing
- Is the surrounding fabric sound?
- Are the care requirements compatible?
- Does the sample remain comfortable and flexible?
Related tools to compare
The grid cloth below is useful for practising a layout. It is not automatically the right patch fabric for your garment; match that separately.
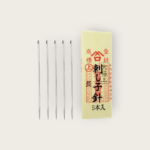 Misuya Chubei – Sashiko Needles – 5 Different Sizes (Pack of 5)
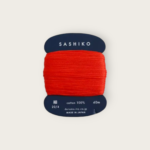 Daruma Sashiko Thread – REGULAR 40m in 29 colours
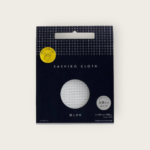 Daruma Gridded Sashiko Cotton Cloth – White