

Sewing Tips & Tool Advice
How to Keep Draping Tape Organised Between Projects
Eight Needles Journal · Patternmaking
A tape case is most useful when it helps you identify and retrieve the right tape quickly. Keeping widths and colours organised also makes it easier to continue a partially marked form without introducing a different reference line.

Choose the right storage format
| Format | What it solves | Check before buying |
|---|---|---|
| Coloured tape supplied with a case | Keeps one selected colour ready to use | The colour and width; several pictured colours do not mean a multipack |
| Separate draping tape case | Houses a compatible loose roll | Whether tape is included and whether your roll fits |
| Small closed compartment in a tool bag | Keeps your chosen rolls and project note together for class | That the rolls stay protected from pins, lint and loose thread |
A dispenser and a carrying bag solve different problems. The dispenser presents the tape end while you work; the bag groups the supplies when you move. If your current tape already comes in a suitable case, you may only need a labelled place to keep it.
Label the working system
Keep a note of the width and purpose of each colour. For example, distinguish baseline references from a temporary design line. Make the note specific to your own project rather than assuming everyone uses the same colour convention.
Keep a note that survives a pause
Record four things: the form or project name, tape width, meaning of the colour and whether measurements use the centre or an edge. For example: “Bodice toile B; 1.5mm blue; proposed neckline; measure to centre.” This is a sample system, not a standard colour code.
Take a clear front, side and back photograph of a layout you need to revisit. Keep the photos with the project notes. When you resume, check the form’s physical reference points as well as the photograph; an image can hide a slight change in level.
Protect the exposed end
Store rolls so adhesive edges do not collect lint or attach to loose paper. Follow the product's storage guidance and keep the case away from the pressing area. A closed compartment is helpful only when the tape inside remains clean and identifiable.
Separate usable tape from scraps
Do not wind removed, lint-covered strips back into the fresh roll. Adhesive that no longer holds reliably can make the next line lift during a fitting. Before using a stored roll on important work, try a short length on a suitable test area and check attachment and removal again.
Keep the width label on the case even when two rolls look similar. A 3mm strip is twice as wide as a 1.5mm strip, so silently changing rolls changes the appearance and the edges of your reference line.
Pack by task
Put the tape case beside the measuring tools you use with the form. When moving between rooms, check that the roll you need is inside before dismantling your working setup. Good organisation saves repeated searching without requiring a larger kit.
A practical example
A project is paused for a week while the form remains marked. Keep a short note with the tape case identifying each colour and width. When work resumes, compare the actual roll with the note before adding more tape, rather than choosing whichever colour looks closest.
Check before choosing
- Can I distinguish the widths?
- Is the exposed adhesive clean?
- Have I recorded my colour convention?
Related tools to compare
Compare the size, material and included parts on each product page against the task above.
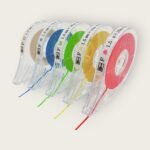 Bunka – Draping Tape in 5 Colours with Case – 1.5mm(16m long)
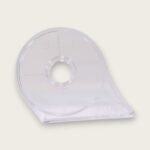 Draping Tape Case
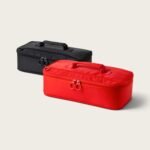 Bunka Sewing Tool Bag – In 2 options