

Sewing Tips & Tool Advice
A Small Sewing Station on a Shared Table
Eight Needles Journal · Workspace & gifts
A shared table needs a sewing setup that can be assembled and cleared without losing the work's place. The aim is a reliable routine: a defined work area, contained tools and clear notes for the next session.
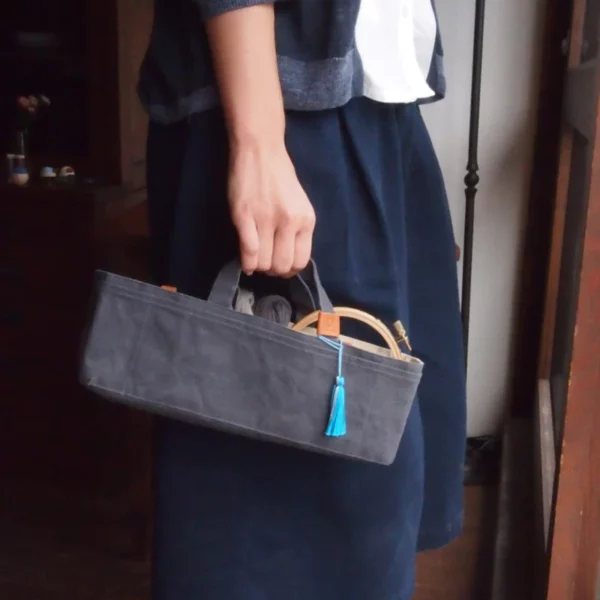
Choose a setup you can clear comfortably
| Storage | What it does well | Trade-off |
|---|---|---|
| Small tray or open organiser | Keeps the current tools visible and easy to lift away | Needs a separate closed home for needles, pins and sharp tools |
| Tool tote with pockets | Moves a selected working kit between storage and the table | Bulky items can hide small notions; protect sharp points individually |
| Lidded box with trays | Contains spare supplies and separates small pieces | Its open lid and trays may occupy more table space than expected |
Try the arrangement with the actual project on the table. If the cloth keeps catching the box, or you have to move three items to reach the snips, reduce the tools left out. A smaller working selection and separate reserve supplies can be easier to use than one fully packed container.
Separate work zones
Keep the current fabric and pattern clear of stored accessories. Place marking and measuring tools where they can be reached without crossing a cutting path. Bring out the larger cutting surface only when the table can support it properly.
Make room for the fabric, not just the machine
A machine needs a stable surface and enough supported space for the project to move without dragging. Check the route of the cable and pedal before starting. When cutting, support the entire cutting mat on a firm, flat surface; a mat overhanging the table is not extra usable cutting space.
Use an appropriate heat-resistant pressing surface for ironing, following its instructions and protecting the table beneath it. A rotary cutting mat is not an ironing mat. Let the iron cool safely before putting it away, and keep it separate from needles, thread and fabric waiting to be sewn.
Pack the project state
Before clearing the table, record the next construction step and secure pattern pieces together. Keep temporary marks and matching labels understandable. A photograph of the arrangement can be useful as a personal reference, but retain the written measurements too.
Finish with a tool check
Return needles, pins and cutting tools to their containers before moving fabric. Check the table and floor for loose items. A compact storage kit works best when it supports this routine rather than simply collecting everything into one large bag.
Leave a note that helps you restart
A useful note is specific: “Sleeve one attached; sleeve two pinned; use 1 cm allowance.” Keep each cut piece with its identity and orientation clear. Do not rely solely on an air-fading marker to preserve tomorrow’s information. Keep the original pattern and use a suitable longer-lasting temporary method where the fabric and instructions permit it.
Separate the working needle from spare needles and count out only the pins you need. At pack-up, return sharp items first, then materials, then the mat. Check the floor as well as the tabletop before the space returns to everyday use.
A practical example
You must clear the dining table before finishing the project. Record the next step, secure the pattern pieces and account for every pin before folding the fabric. The next session should begin from a clear note, not from reconstructing a pile of loose pieces.
Check before choosing
- Can the work area be fully cleared?
- Is the next step recorded?
- Are sharp tools accounted for before the table is shared?
Related tools to compare
Compare the size, material and included parts on each product page against the task above.
 Cohana-Waxed Canvas Tool Tote Bag in 4 colours
 Clover Ruler Card
 Cohana-Cypress Pincushion in 5 colours